
이번 프로젝트에서는 API 문서를 자동화하고 공유하기 위해 Swagger와 Spring REST Docs를 모두 적용해봤다. 둘 다 장단점이 명확했지만, 결론적으로는 REST Docs를 중심으로 사용하게 되었다. 이 글에서는 두 방식의 차이와 실제 적용 후 느낀 점, 그리고 각각의 사용법을 간단히 정리한다.
두 방식의 차이 비교
| 항목 | Spring REST Docs | Swagger (Springdoc/OpenAPI) |
| 문서 생성 방식 | 테스트 기반 (MockMvc 등) | 코드 기반 애너테이션 |
| 정확성 | 실제 응답을 기반으로 생성됨 | 애너테이션 기반 → 실제 응답과 다를 수 있음 |
| 의존성 | Asciidoctor + restdocs 필요 | springdoc-openapi 또는 springfox |
| 목적 | 배포용 정적 문서 | 개발자 UI 테스트용 |
| 테스트 요구 | 필수 (통합 테스트 필요) | 불필요 |
| UI 제공 | 없음 (HTML 수동 확인) | Swagger UI 있음 |
| 문서 포맷 | AsciiDoc → HTML | OpenAPI (YAML/JSON) |
| 커스터마이징 | 자유도 높음 | 상대적으로 제한적 |
개인적으로는 REST Docs가 문서의 신뢰성과 일관성 면에서 훨씬 안정적이라고 느꼈다.
프론트엔드에게 문서를 PDF나 HTML로 정리해서 넘기기에도 편했고, 테스트 기반이다 보니 코드를 바꾸면 문서도 자연스럽게 바뀌는 구조였다.
단점이라면, 정말 사소한 수정 하나에도 테스트가 깨져서 다시 수정하고 실행해야 한다는 점...? 번거롭긴 해도, 그만큼 내가 작성한 API의 동작을 정확히 이해하고 있어야 테스트를 수정할 수 있기 때문에, 코드 이해도를 높이는 데도 도움이 된다.
Swagger는 왜 같이 써봤는가?
프론트 쪽에서는 Swagger가 더 편하다는 얘기를 듣고 도입해봤다.
의존성만 추가하면 브라우저에서 바로 테스트할 수 있는 UI가 제공되고, 실제 요청을 서버 없이 테스트해볼 수 있어서 빠르게 피드백을 주고받는 데는 분명 도움이 되어보였다.
하지만 단점도 있었다. 문서가 실제 응답이 아니라 개발자가 지정한 애너테이션 기반으로 만들어지기 때문에, 문서와 실제 동작이 불일치할 가능성이 있고, @Operation, @Schema 등 다양한 애너테이션을 붙이다 보면 코드가 지저분해지는 느낌이 있었다.
개인적으로는 이런 중복 설명이 생기는 구조를 별로 좋아하지 않아서 Swagger를 메인으로 사용하지 않게 되었다.
Swagger
<!-- https://mvnrepository.com/artifact/org.springdoc/springdoc-openapi-starter-webmvc-ui -->
<dependency>
    <groupId>org.springdoc</groupId>
    <artifactId>springdoc-openapi-starter-webmvc-ui</artifactId>
    <version>2.8.9</version>
</dependency>
의존성 추가는 단순하다. ( 최신 버전을 확인해서 적용했다.)

http://localhost:8080/swagger-ui/index.html 에 접속하면 Swagger UI에서 바로 요청 테스트가 가능하다.
내용이 만족스럽지 않아서 코드를 추가했다.
Swagger 문서 주석 종류
| 주석 | 대상 | 설명 |
| @Tag | 클래스 | API 그룹 이름 및 설명을 지정합니다. (User API, 뉴스 요약 API 등) |
| @Operation | 메서드 | API 메서드의 제목과 설명을 지정합니다. |
| @Parameter | 파라미터 | 쿼리 파라미터나 경로 변수의 설명을 작성할 수 있습니다. |
| @RequestBody (Spring 기본) + @io.swagger.v3.oas.annotations.parameters.RequestBody | 요청 본문 설명을 따로 지정할 때 사용됩니다. | |
| @ApiResponse, @ApiResponses | 메서드 | 응답 코드 및 메시지 설명을 추가합니다. |
| @Schema | DTO 필드 | 필드 설명, 예시, 필수 여부 등을 정의할 수 있습니다. |
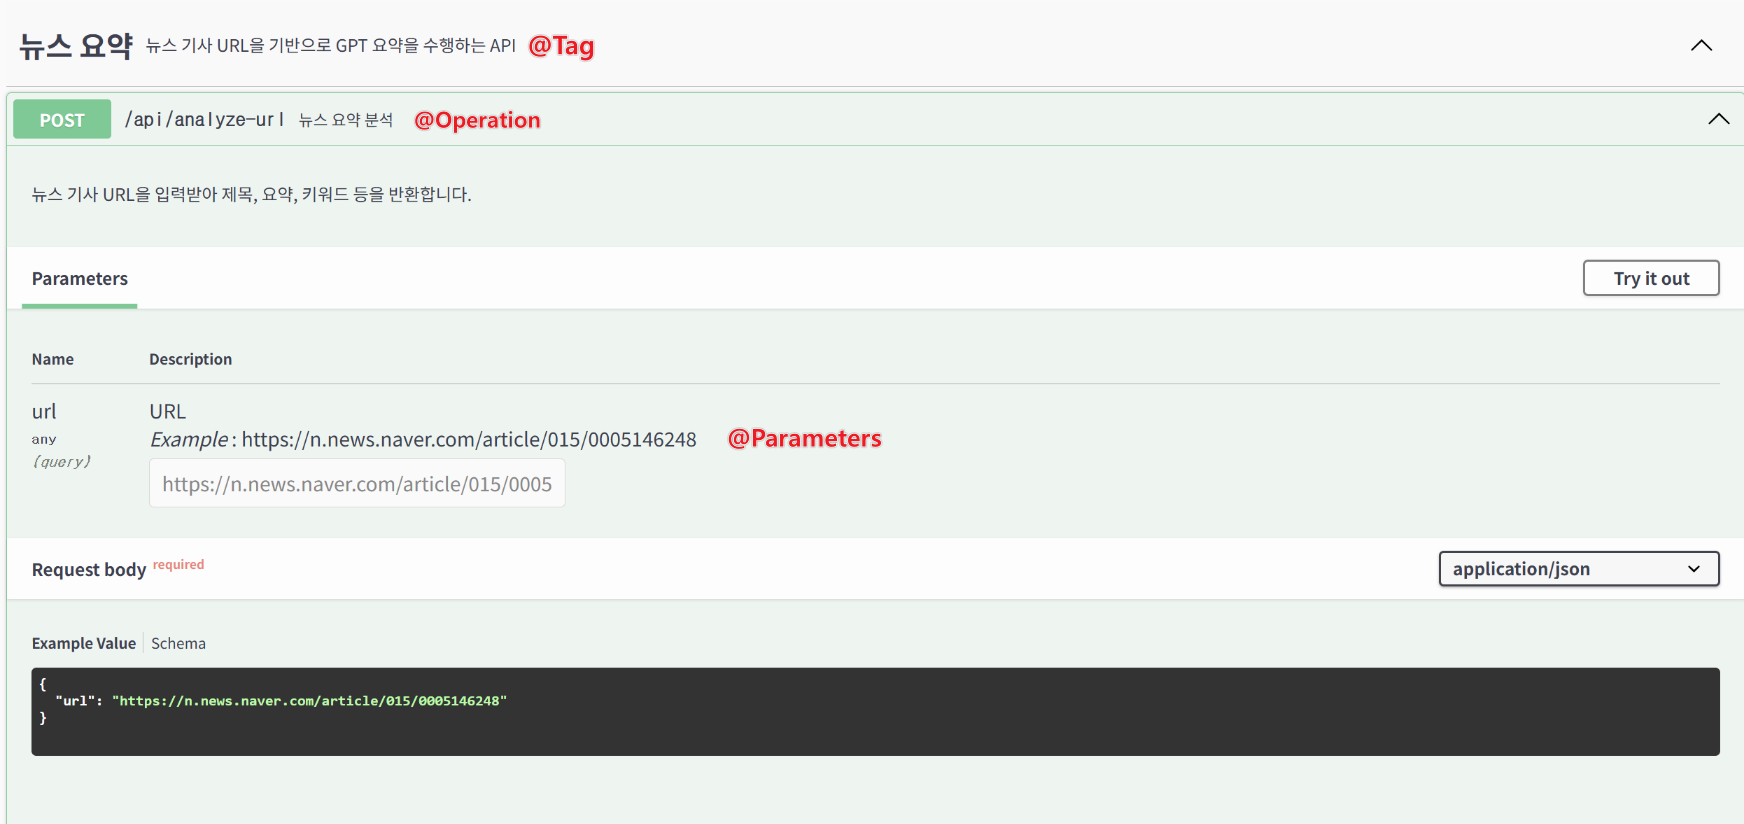
Swagger 적용
@RequestMapping("/api")
@Tag(name = "뉴스 요약", description = "뉴스 기사 URL을 기반으로 GPT 요약을 수행하는 API")
public class NewsController {
    @Operation(
            summary = "뉴스 요약 분석",
            description = "뉴스 기사 URL을 입력받아 제목, 요약, 키워드 등을 반환합니다."
    )
    @Parameters({@Parameter(name = "url", description = "URL", example = "https://n.news.naver.com/article/015/0005146248")})
    @ApiResponse(responseCode = "200", content = @Content(schema = @Schema(implementation = NewsResponse.class)))
    @PostMapping("/analyze-url")
    public NewsResponse analyzeUrl(@RequestBody NewsRequest request) {
        NewsResponse newsResponse = newsService.getNewsResponse(request.getUrl());
        if (newsResponse == null) throw new RuntimeException("process error!");
        return newsResponse;
    }
    ...

Controller말고 DTO에도 @Schema 적용했는데, 역시 코드가 지저분하다..
Spring REST Docs
    <dependency>
        <groupId>org.springframework.restdocs</groupId>
        <artifactId>spring-restdocs-mockmvc</artifactId>
        <scope>test</scope>
    </dependency>

...

<build>
        <plugins>
            <plugin>
                <groupId>org.asciidoctor</groupId>
                <artifactId>asciidoctor-maven-plugin</artifactId>
                <version>2.2.1</version>
                <executions>
                    <execution>
                        <id>generate-docs</id>
                        <phase>prepare-package</phase>
                        <goals>
                            <goal>process-asciidoc</goal>
                        </goals>
                        <configuration>
                            <backend>html</backend>
                            <doctype>book</doctype>
                        </configuration>
                    </execution>
                </executions>
                <dependencies>
                    <dependency>
                        <groupId>org.springframework.restdocs</groupId>
                        <artifactId>spring-restdocs-asciidoctor</artifactId>
                        <version>${spring-restdocs.version}</version>
                    </dependency>
                </dependencies>
                <configuration>
                    <outputDirectory>${project.build.outputDirectory}/static/docs</outputDirectory>
                </configuration>
            </plugin>
            <plugin>
                <groupId>org.springframework.boot</groupId>
                <artifactId>spring-boot-maven-plugin</artifactId>
            </plugin>
        </plugins>
    </build>
의존성 주입
@AutoConfigureRestDocs
@AutoConfigureMockMvc
@SpringBootTest
@Import({TestMockConfig.class})
public class NewsControllerRestDocsTest {

    @Autowired
    private MockMvc mockMvc;

    @Autowired
    private NewsService newsService;

    @Test
    void analyzeUrl() throws Exception {
        // given
        String url = "https://n.news.naver.com/article/015/0005146248";
        NewsRequest request = new NewsRequest(url);
        NewsResponse mockResponse = new NewsResponse(
                "뉴스 제목",
                "요약된 본문",
                "사회",
                List.of("키워드1", "키워드2"),
                url
        );

        // when
        Mockito.when(newsService.getNewsResponse(anyString())).thenReturn(mockResponse);

        // then: RestDocs 문서화
        mockMvc.perform(post("/api/analyze-url")
                        .contentType(MediaType.APPLICATION_JSON)
                        .content(new ObjectMapper().writeValueAsString(request)))
                .andDo(print())
                .andExpect(status().isOk())
                .andDo(document("analyze-url",
                        preprocessRequest(prettyPrint()),
                        preprocessResponse(prettyPrint()),
                        requestFields(
                                fieldWithPath("url").description("뉴스 기사 URL")
                        ),
                        responseFields(
                                fieldWithPath("title").description("뉴스 제목"),
                                fieldWithPath("summary").description("요약된 본문"),
                                fieldWithPath("topic").description("기사 주제"),
                                fieldWithPath("keywords").description("핵심 키워드 리스트"),
                                fieldWithPath("url").description("기사 URL")
                        )
                ));
    }

}

@TestConfiguration
public class TestMockConfig {
    @Bean
    public NewsService newsService() {
        return Mockito.mock(NewsService.class);
    }
}
REST Docs의 경우 실제 로직이 실행되기 때문에, 외부 API 호출을 포함하는 서비스(newsService)는 Mock 처리해주어야 한다.
그렇지 않으면 테스트할 때마다 OpenAI 토큰이 소모되기 때문.


정상적으로 실행되면, target > generated-snippets 경로에 document() 첫번째 파라미터로 넣은 string 으로 디렉터리가 생성된다.
= 뉴스 요약 API 문서
:toc: left
:source-highlighter: highlightjs
:snippets: {snippets}

== 뉴스 요약 요청

include::{snippets}/analyze-url/http-request.adoc[]
include::{snippets}/analyze-url/http-response.adoc[]
include::{snippets}/analyze-url/request-fields.adoc[]
include::{snippets}/analyze-url/response-fields.adoc[]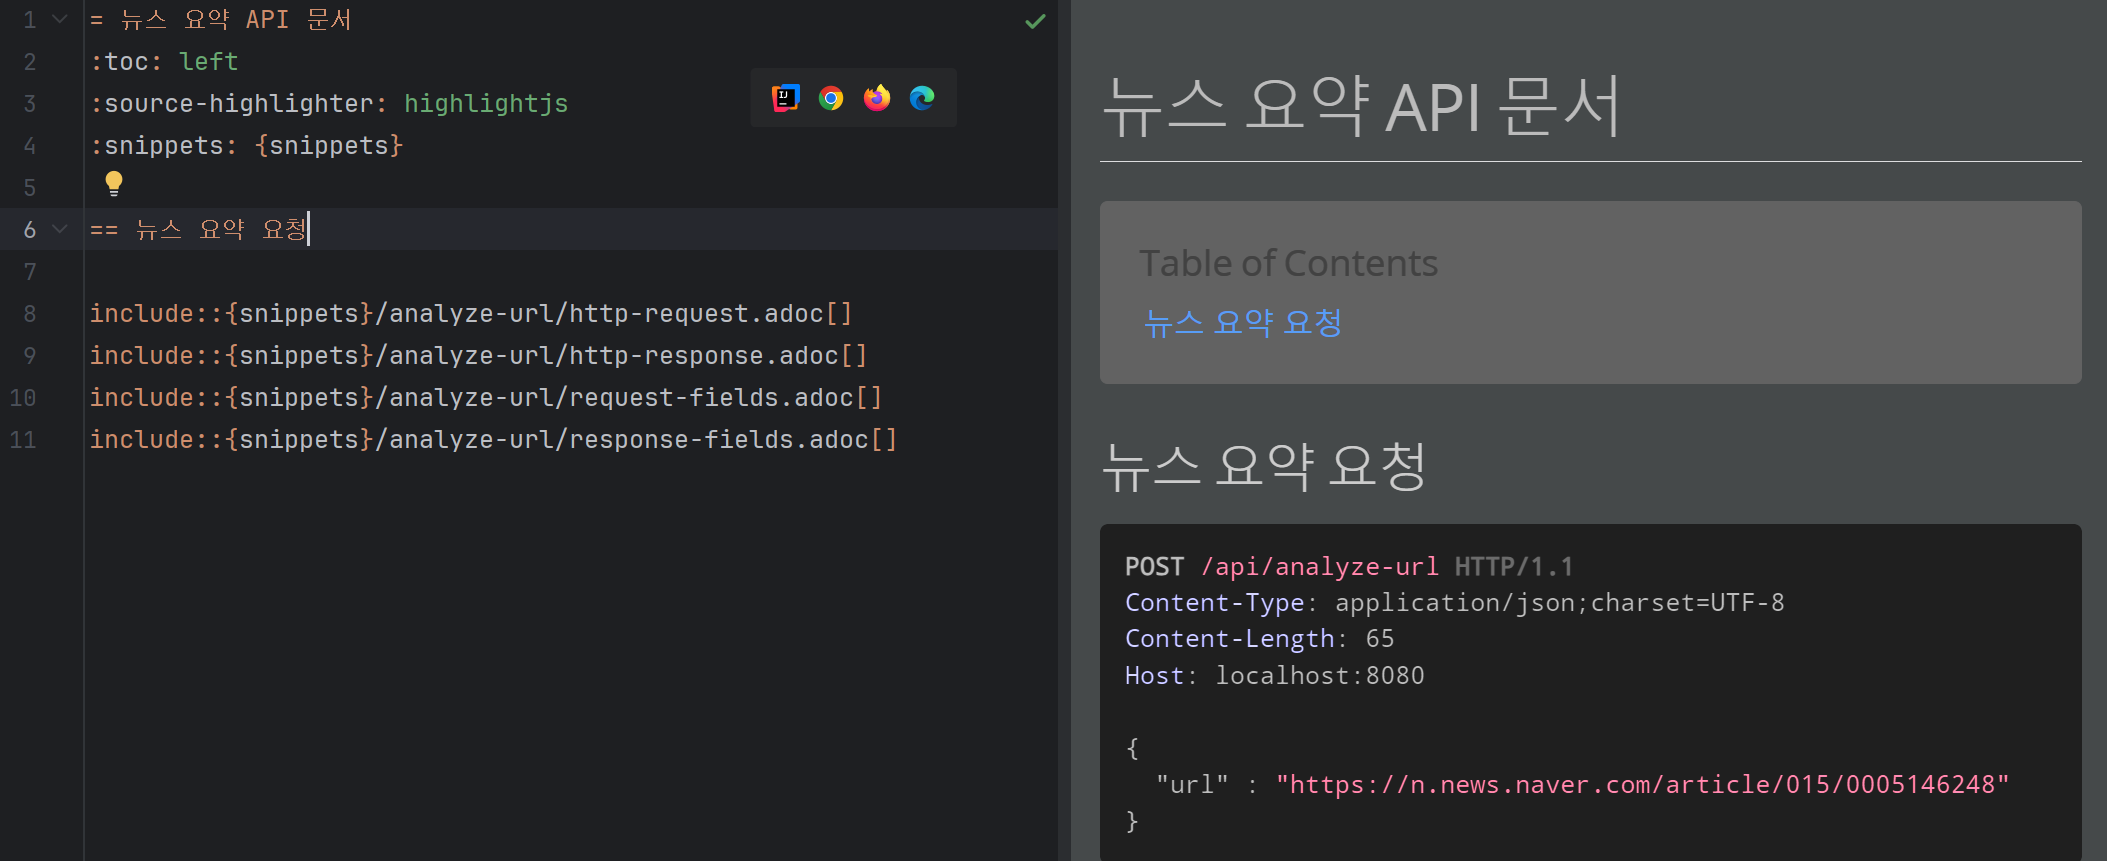
src > docs > asciidoc > index.adoc 에 문서를 작성하면 오른쪽(인텔리제이)에서 프리뷰로 확인할 수 있다.
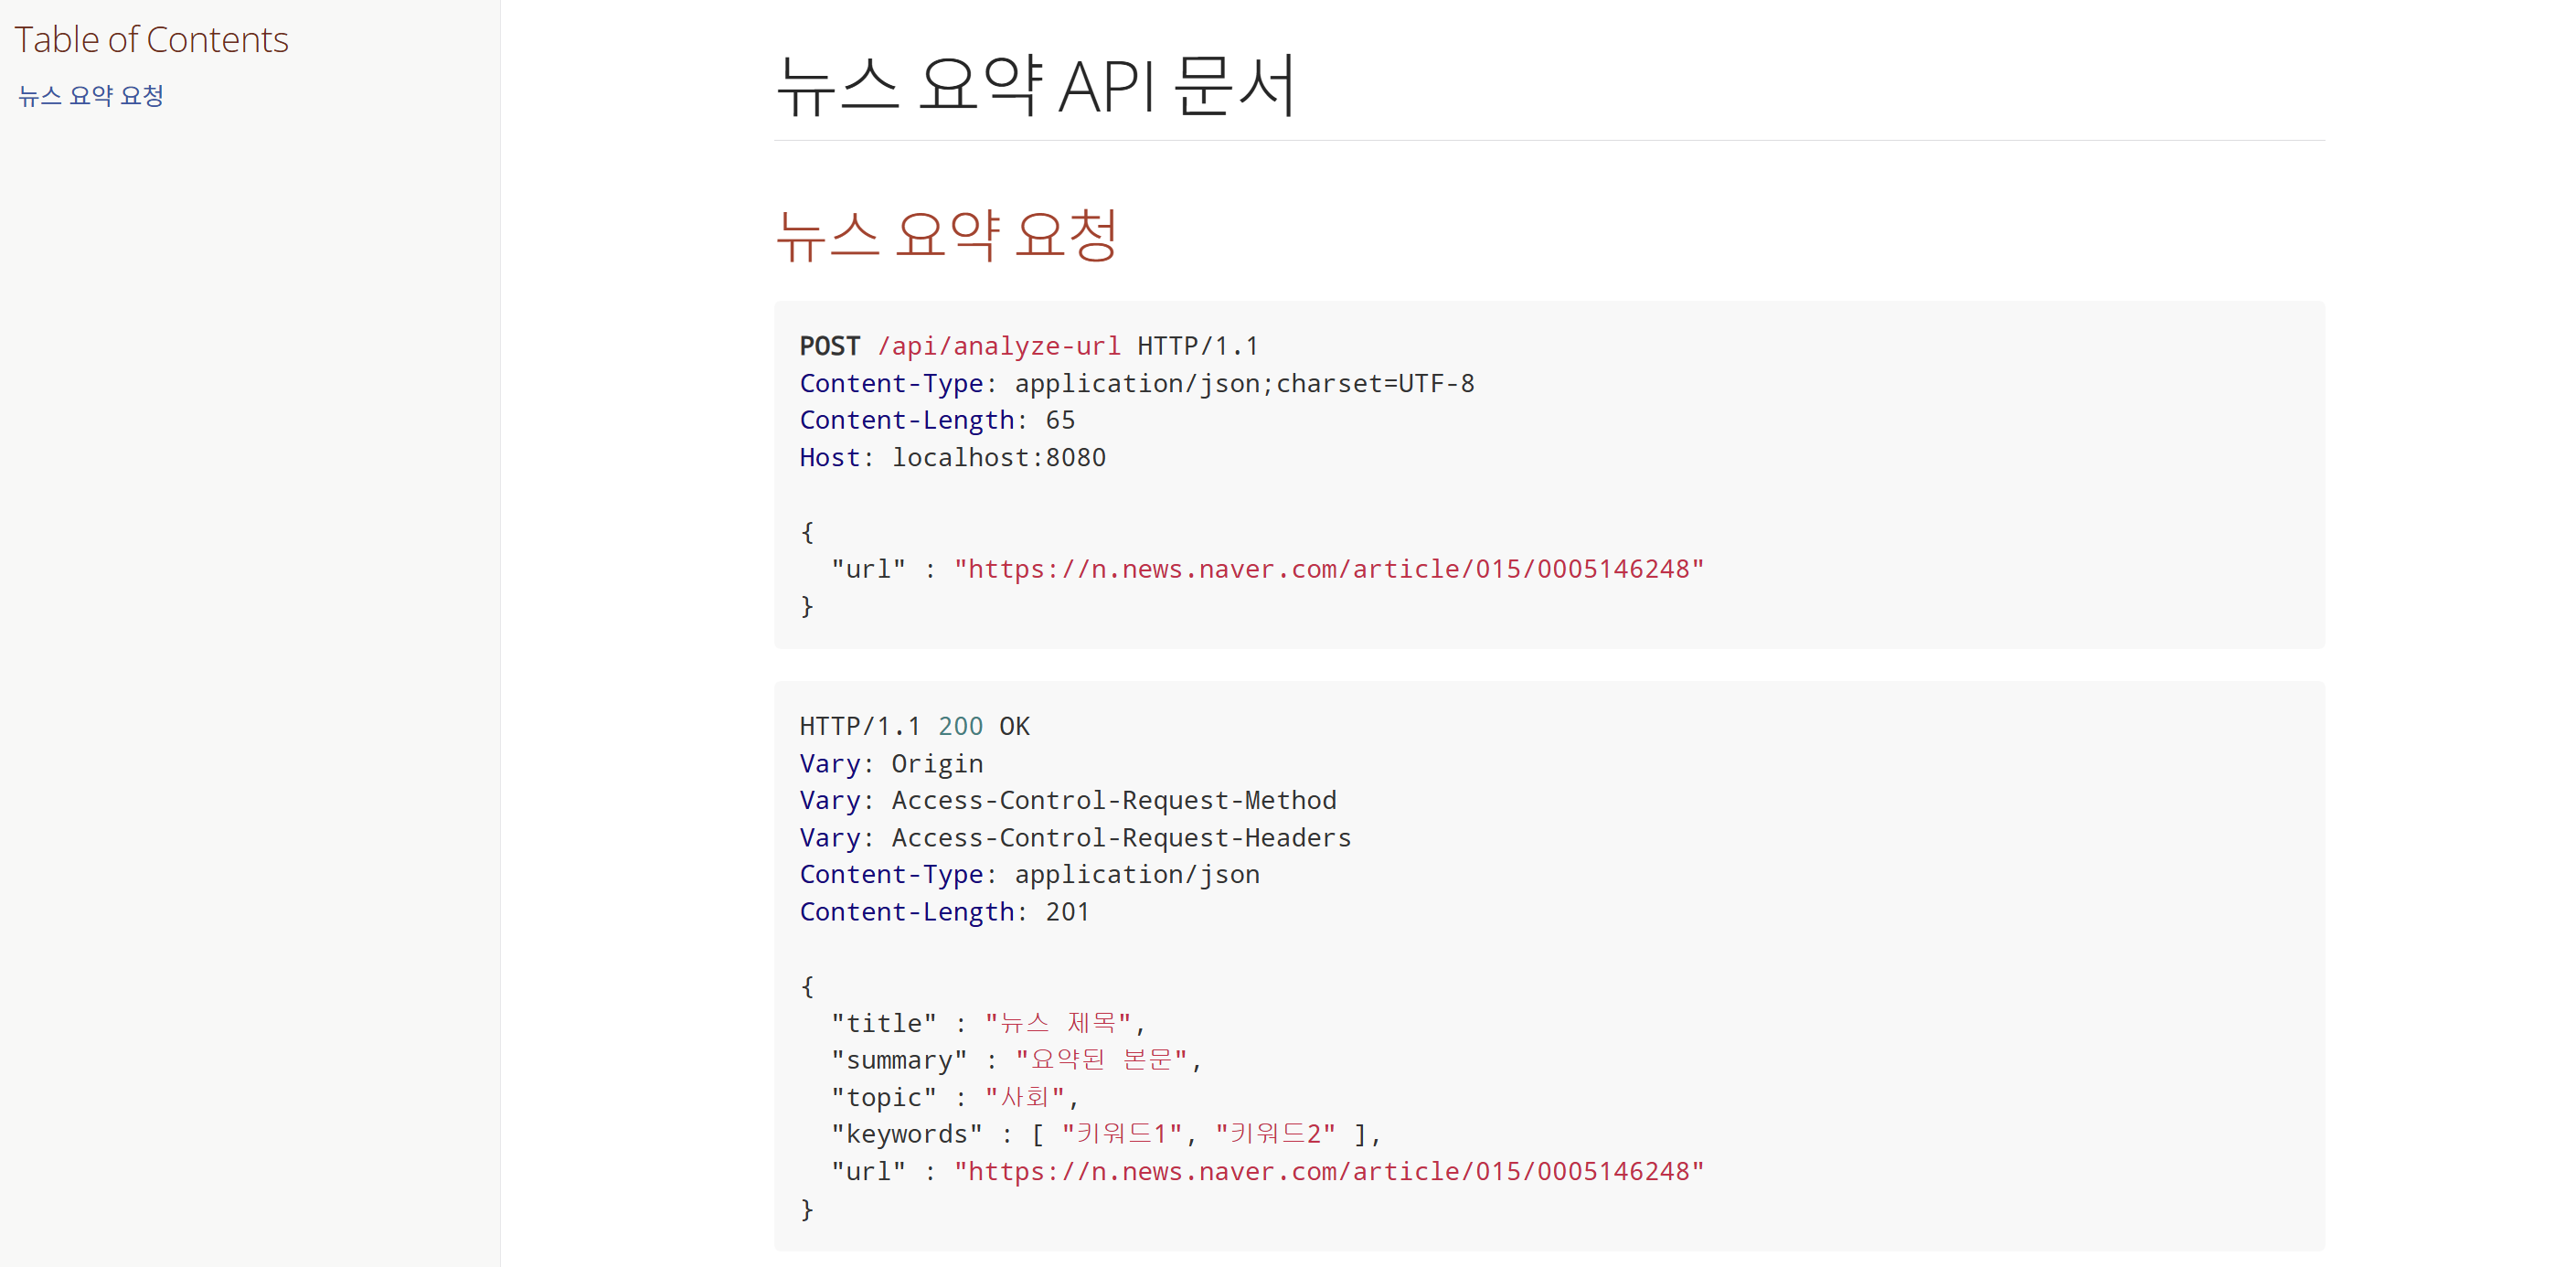
빌드가 완료되면 http://localhost:8080/docs/index.html 에서 정적 HTML 문서를 확인할 수 있다.
개인적으로는 프론트엔드에게 HTML/PDF 문서를 전달하기 쉬워서 이 구조가 더 편했다.
Whitelabel Error Page
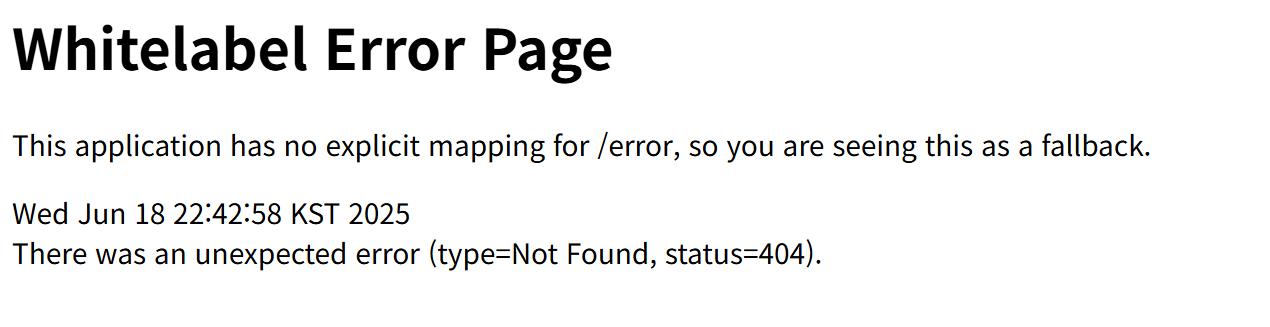
위와 같은 에러가 뜬다면, pom.xml 에 아래 내용이 추가되어 있는지 확인하고 프로젝트를 빌드 후 재접속한다.
<configuration>
	<outputDirectory>${project.build.outputDirectory}/static/docs</outputDirectory>
</configuration>
프론트엔드와 빠르게 협업할 때는 Swagger가 직관적이고 좋은 도구라고 생각한다.
반면 문서 정확성과 관리 효율을 중요하게 생각한다면 REST Docs가 더 좋은 선택이었다. 무엇보다 REST Docs는 테스트 기반이기 때문에, 문서가 항상 실제 동작과 일치한다는 점에서 신뢰감이 있다. 반대로 급한 수정이 필요할 때 테스트까지 수정해야 하니 다소 번거로운 점도 있지만, 그 과정을 거치면서 테스트와 문서, 코드에 대한 이해도가 모두 높아진다는 점에서 충분히 가치 있었다.
개인적으로는 주석이 많은 Swagger보다, 명확한 책임 분리가 가능한 REST Docs 쪽이 더 선호됐다. 다만 프로젝트나 팀 상황에 따라 두 도구는 함께 사용할 수도 있고, 목적에 따라 나눠 쓰는 것도 좋은 전략일 것 같다.
'프로젝트 > 뉴스 요약 (AI)' 카테고리의 다른 글
| [뉴스 요약] REST API 예외 응답 처리 (1) | 2025.06.25 |
|---|---|
| [뉴스 요약] AI 중복 요청 분기 처리 (Database 구성) (0) | 2025.06.23 |
| [뉴스 요약] 프론트 (Vite + React) (1) | 2025.06.20 |
| [뉴스 요약] 백엔드 (Jsoup 파싱 + ChatGPT AI 연결) (4) | 2025.06.19 |
| [뉴스 요약] AI API를 이용한 뉴스 요약 프로젝트 기획 (1) | 2025.06.18 |